Edit Mode
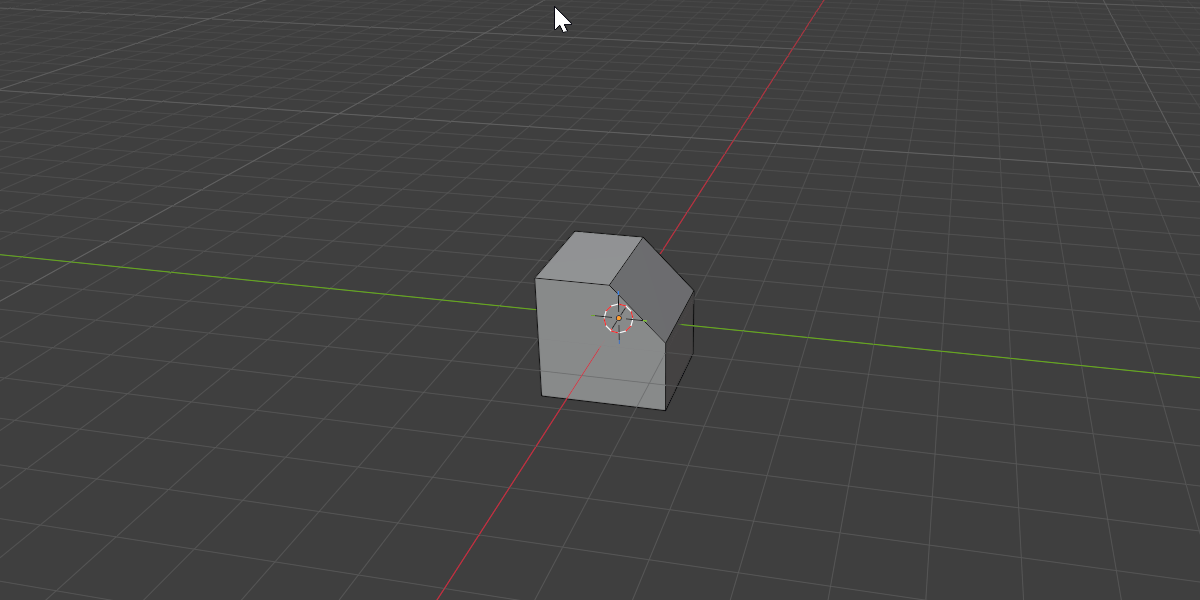
In Edit Mesh, Alt+X gives you a Mirror tool that symmetrizes real geometry across a plane built from your current selection. Unlike the Object-mode modifier, this is a destructive bmesh operation: it writes new vertices, edges, and faces directly into the mesh.
The mirror plane is derived from what you have selected — its Orientation and Pivot come from the selection, so where you click and what you select determines exactly how the symmetry lands.
The gizmo
When the Mirror tool is active in Edit Mesh, the gizmo sits on the mirror plane derived from the current selection. There are two kinds of clickable parts:
- Handles (the arrows) mirror the selection — they symmetrize only the selected geometry across that axis.
- Dots (the small boxes) mirror the full mesh — the whole mesh is symmetrized across that axis, regardless of what is selected.
Use the handles when you have modelled half of a detail and want only that part flipped; use the dots when you want the entire object made symmetric in one click.
Orientation
Orientation sets which axes the mirror plane uses. In Edit Mesh the options are:
| Orientation | Plane axes |
|---|---|
| Global | World axes, identical everywhere |
| Local | The object’s own axes; follows rotation |
| Cursor | The 3D cursor rotation, for arbitrary angles |
| Normal | The orientation of the selection normal (default) |
| Custom | A plane you defined with the Space picker |
Normal is the edit-mode default: the plane aligns to the normal of your current selection, which is ideal for symmetrizing across a face or an angled loop. Press Q to cycle to the next Orientation.
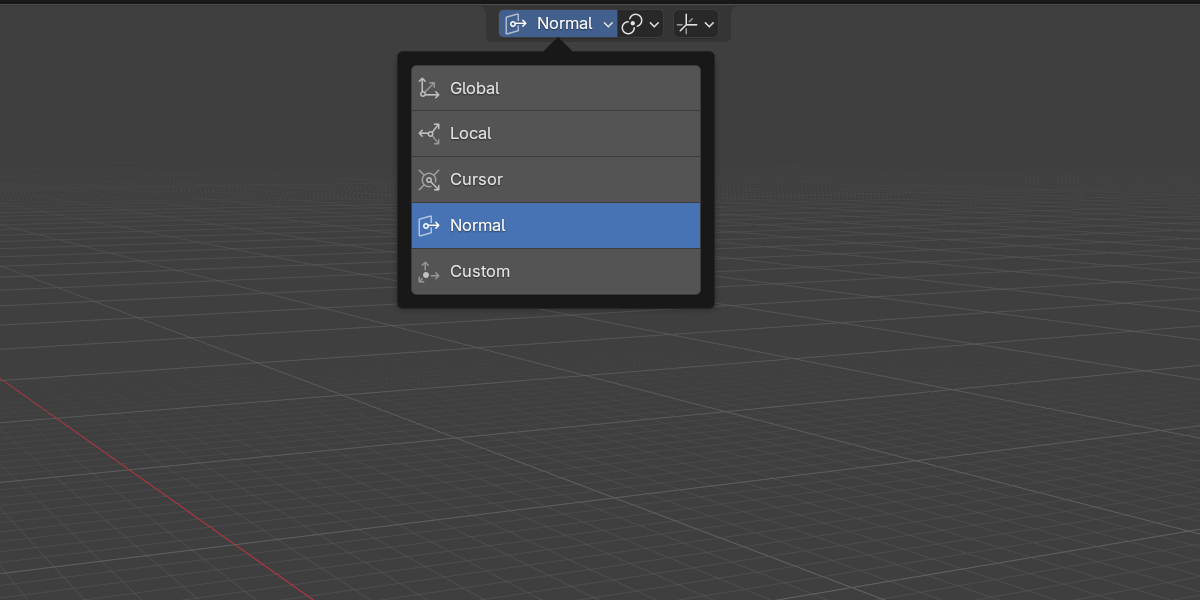
See Orientations for the full breakdown of each option.
Pivot
Pivot sets where the mirror plane passes through. In Edit Mesh the options are:
| Pivot | Plane passes through |
|---|---|
| Active Element | The active vertex / edge / face |
| Median Point | The selection median (default) |
| Object Origin | The object’s origin |
| 3D Cursor | The 3D cursor |
| Custom | A point you picked |
Median Point is the edit-mode default, so the plane sits at the centre of your selection. Press E to cycle to the next Pivot.
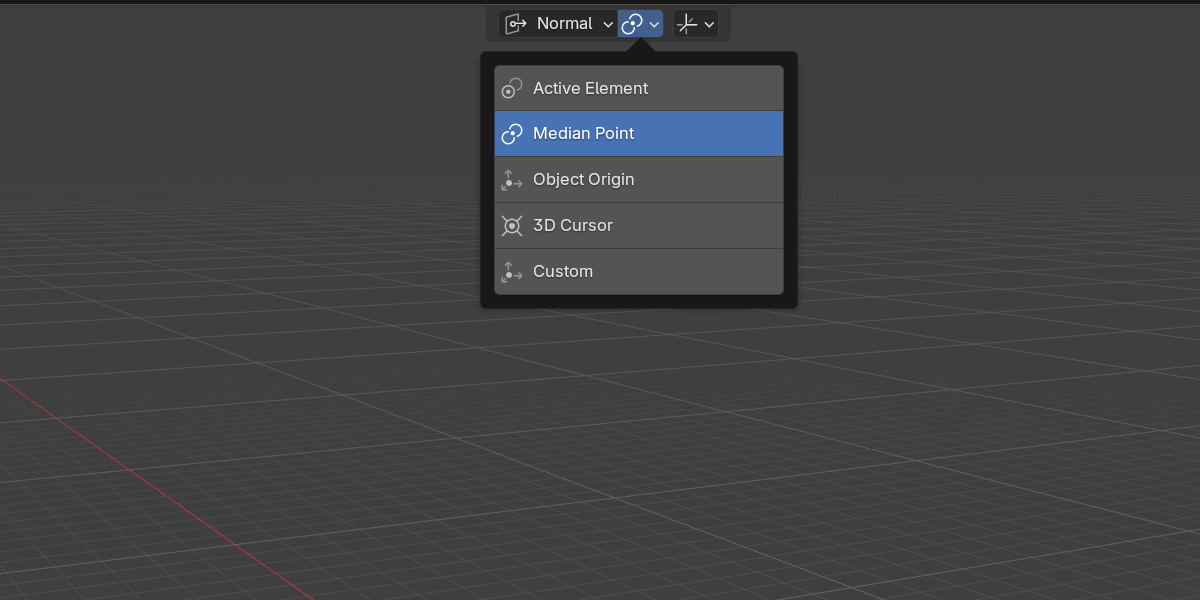
See Pivots for details and use cases.
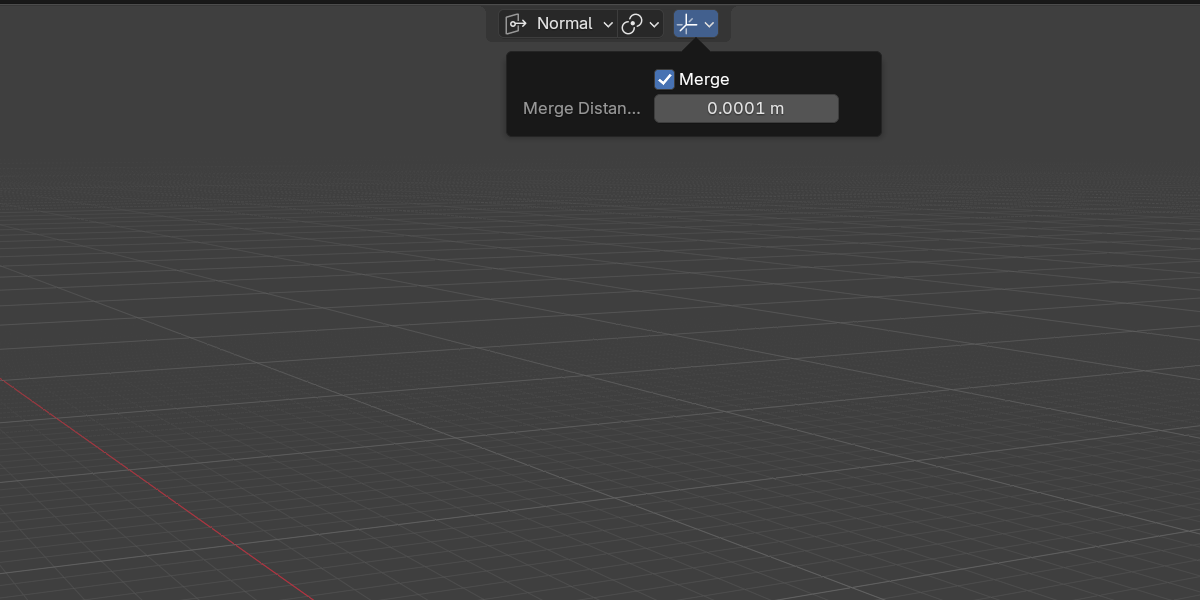
Merge
Symmetrizing can leave a doubled seam where the new geometry meets the original. The Merge option welds the mirrored geometry to the original at the seam, within Merge Distance.
- Merge on: vertices within Merge Distance of the plane are welded together for a watertight result.
- Merge off: the mirrored half is left as separate geometry.
Both live in the Tool Options popover in the header.
Custom plane
Space works in Edit Mesh too: aim at any visible mesh element to pick an arbitrary plane, then confirm to switch Orientation and/or Pivot to Custom. The picked values are stored separately from Object mode, so your edit-mesh Custom plane and your object-mode one never overwrite each other.
See Custom Plane for the full picker workflow.
Next
Continue to Orientations.